Let’s see how to make your iPhone camera better?
There is no device better than the iPhone to take some quality pictures.
Because it has amazing hardware, excellent software and anyone can use it easily.
Although there are some kinds of restrictions as well like some other cameras, you can get the most out of it through your photography skills.
Here are some important tips and methods which can help you to make your iPhone camera better.
Now we will share some important tips and tricks with you to use the iPhone camera in a better way to take some quality photos.
How to Make your iPhone Camera Better
-
Use the iPhone Camera Shortcut
A number of different third-party camera apps are available in the market.
But you need some speed from your side if you want to take a snap of a little baby or your pet.
Maybe you don’t get this speed from your device but you can find a camera app.
Then you have to tap on this app and wait to load this app.
From the lock screen, you have to swipe up on your iPhone camera shortcut and then you can take pictures easily and quickly without wasting any amount of time.
Something similar you can also do from your home screen by swiping up from the bottom screen and launching the control center and then at the end you just have to tap on the camera button.
-
Experiment With Third-Party Apps For Better Camera Quality
Some people also suggest downloading third camera apps if you are not in a hurry to take a snap.
Apple has opened a control group of developers including, white balance, shutter speed, ISO, and exposure.
It reflects that now you can take pictures with even better quality as compared to the pictures which you take from the default camera applications of the iPhone.
Although it is not possible to assign a camera shortcut button to third-party applications, you can put these apps in Dock due to which you can access these apps easily from the home screen of your iPhone.

-
Focus Shooting Mode Around End Result
There are a number of different modes available in the default camera app of Apple which includes square, panorama, and photo.
Maybe it seems some kind of common-sense instruction but in reality, it helps you to shoot the picture in the mode which you plan to publish for it.
Like if you are taking pictures to post them on Instagram you would like to shoot in square mode instead of taking photos in photo mode and then crop them.
It will help you to frame your picture in a better way instead of inventing new framing.
-
Follow the Rule of Thirds
There will be a grid option in your iPhone which can help you to line up photographs to follow the rule of thirds.
If you want to turn on this option, go to the settings of your iPhone then Photos and Camera, and enable Grid switch.
It is suggested to keep this button on all the time because it is there as a reminder and helper but you can also turn off this option any time by going to the Photos and Camera section of your iPhone settings.
-
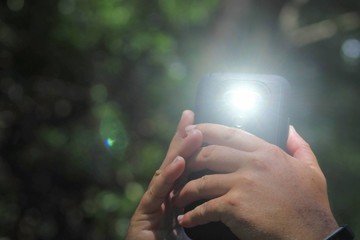
Turn off your Flash
There is much improvement of iPhone flash upon their predecessors in the modern generation but after all the flash is only an LED light.
It does not have enough power but sometimes it can emit a strange color on your photos with its TrueTone technology.
You should make it possible to shoot pictures in natural light.
But, if due to any reason you have to shoot at night you can use the Camera app’s exposure slider to increase the light in your photos.
If you like to carry out some kind of extra gear then we would recommend having Pocket Spotlight, Photojojo’s as they can emit more light than the tiny flash of your iPhone.
-
Use Burst Mode for Action Shots
The burst mode is one of the best options to take some excellent quality pictures when you are going on a bumpy ride, attempting sports photography, or chasing around the kids.
The purpose of the iPhone to add the burst is to take clear pictures of moving things or subjects but it also works quite well when your camera is also moving.
You can get a clear shot by snapping photos in quick succession and you also have some more options available to choose from.
If you want to shoot in burst mode you have to tap and hold down the shutter button when you are going to start.
You will see a counter at the bottom screen while holding the shutter button and this counter will let you know how many images you have snapped till now.
Now if you want to stop shooting you just have to lift up your finger and the burst will be saved in the camera roll of your iPhone.
-
Turn on HDR Auto
There is a software feature known as High Dynamic Range in your iPhone.
This software feature helps you to take photos that have high contrast light sources and it still takes a nice photo distorting the dark or light areas of the picture.
This can be done by your iPhone by taking several photos in quick succession at different exposures.
After that these images are merged to create a unified image.
From the camera app, you can manually turn on or off HDR. But auto HDR of iOS 8 is preferable because it uses information from your iPhone sensor when you point your iPhone to a subject and determine when HDR correction is needed by an image.
You can enable HDR with the little yellow HDR box from the bottom of the screen.
These options can help you to save some storage of your device and prevent some unnecessary HDR shooting.
-
Holding your Viewfinder Down on a Spot
If you are going to shoot macro photography or want to prevent your iPhone camera from grabbing a different subject in the frame then it will be very useful to lock your focus point on the current subject.
For this, you have to tap and hold on to the subject you want to focus on until you see the lock alert of yellow AF/AE.
It reflects that the automatic focus metering and automatic exposure metering have been locked to your subject.
You just need to tap anywhere on the frame to remove the lock.
-
Slide Exposure Meter to Brighten Images
If a particular image is underexposed or blown out you can fix it easily before shooting by adjusting the yellow slider exposure next to the square focus.
For this, you just have to tap on the square focus and exposure slider and then you can increase your exposure by sliding upward and using the sun icon or decreasing exposure by sliding down.
-
Snap Photos with the Volume Button
As the iPhone is so lean and thin it can cause the camera to shake and blur your photo by tapping the digital shutter.
Rather, you can use the volume button to take a picture from the camera app and avoid camera shake completely.

-
Set Your Camera To Open In One Mode Every Time
You will have the “Preserve Settings” option in your iPhone camera and it will be useful for some of you.
With this option, you can preserve the last enable mode, when you open up your camera.
This could be a LivePhoto, Filter, or even a camera mode.
For many of us, it is highly irritating and the default is Live Photo of your camera is always on.
But most people will don’t want to turn on this option.
You can turn off all the sliders to revert to the basic natural camera.
For this, you have to navigate to the settings then the camera, and preserve settings.
-
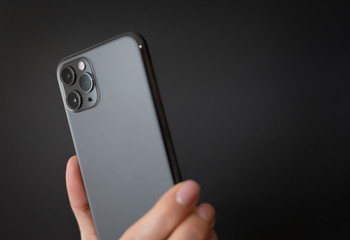
Clean Your Camera Lens
It is important to clean your lens to make your iPhone camera better.
It seems very clear but most of the time your iPhone camera quality is affected because of the smudges or dirtiness on your camera lenses.
It means you should check the camera lenses of your iPhone for any kind of smudges or debris before shooting pictures.
It is more important for the big iPhones as it is easier for camera lips to trap debris.
As we are having a discussion on the topic of cleanliness make sure to clean your screen.
Because it can hurt your ability to take photos if you are not able to frame properly due to the smudges on the camera lens.
-
Avoid Using Digital Zoom
The iPhone does not have optical zoom instead it features a fixed lens. Digital zoom is not referred to as zoom at all.
Digital zoom is used for image cropping.
Due to this reason, most of the pictures captured with digital zoom appear to be pixelated or grainy.
There is an appropriate application that digital zoom has.
But you don’t need to use it in each scenario of shooting.
-
Get in close to make your iPhone Camera Quality Better
You must move closer to the subject instead of depending on the digital zoom. It will not only allow you to capture objects closely instead it also allows you to take benefit from the f/2.2 aperture of the iPhone.
Moreover, focusing on an object closely will create a separation in background or foreground which allows for the shallow depth of field.
-
Zoom and lock focus
As we have discussed earlier that you should not use the digital zoom while taking photos but it does not mean at all that you cannot use this feature to take benefits during photography.
You can focus on a particular frame area with digital zoom.
After that, you can zoom back out to capture an image.
-
Manually Adjust Exposure
As we know, there is a fixed aperture in the iPhone but still, it is possible to adjust the exposure manually, and basically, that is one of the methods to change the ISO and shutter speed values.
You have to depend on the exposure slider as there is not any kind of individual control over such values.
If you want to adjust focus you have to tap on focus and then slide up or down the viewfinder.
From here you will observe the exposure slider moving along the swipes and you will also observe that the photo becomes overexposed and it relies on which way you move the slider.
-
Use AE/AF lock
You can also tap and hold to the viewfinder to lock the focus and exposure instead of just tapping on focus.
During locked, to change exposure while maintaining a locked focus you can also use the exposure slider.
You can control the shutter by using the volume buttons or EarPod.
The iPhone camera has features like optical image stabilization which helps to take some quality still pictures as movement can be an enemy to still photos.
By using the physical volume buttons to take pictures you can reduce movement while capturing images.
It is better to connect EarPods and on the remote to invoke the shutter using the volume buttons.
-
Using a Tripod or a Monopod for Stability
To increase the stability you can use a monopod or a smartphone mount with a tripod.
There are some quality smartphone mount tripods available in the market to make your phone camera quality better.
You can also get the amount to use it with any standard tripod.
-
Using HDR
You can enable HDR from your camera app and work by collecting the three image shots from three different exposures and create what it considers will be the most ideal image.
In up-close scenarios along with precarious lighting, the HDR works very well or in the lighting conditions where surrounding lighting differs from the lighting of the subject.
You can also enable auto HDR to make things easier because iOS is very good at judging when your photos get an advantage from this type of setting.
-
Using Watch as a Trigger and Viewfinder
You can use an Apple watch to see what is seen by your iPhone camera.
In surprising situations, it is very useful like when you have to check the cupboard tops to find some lost items or bending yourself down to capture the image of your TV’s serial number.
Either you have to take a shot instantly or after a little pause as a remote shutter.
You also have an iPhone with the best quality camera.
-
Reduce iPhone Camera Shaking
A lot of things have been improved in the iPhone camera but still, it struggles to take some good shots in low lighting; like at dusk or indoors.
It often takes long exposures to compensate for the low light and the scene will get smeared a little if you are not holding the iPhone completely still.
There are some old fashion techniques which can help you to reduce the shaking of your hands as much as possible.
Like you can push the side of your body against a vertical surface to steady it bracing your iPhone holding in both of your hands and tucking your elbows to your body.
Moreover, you can use the self-timer of two seconds.
With this while taking a shot actually you are not pressing a shutter and you enable the timer simply by shaking the camera with a simple act.
Then press the shutter and after that, in just two seconds the iPhone camera will take the actual shot.
You just have to hold the iPhone and brace yourself.
-
Adding a Macro Mode to your iPhone
Here we will recommend a third-party app as there are a number of different filters available in this app but we will not recommend using them.
One of the best features of Camera+ is it,s shooting features which can lock the lens element of your iPhone to take photos much closer to the subjects as compared to the built-in app.
You must have a steady hand as the focal range is a small and compliant subject but you can get some excellent results as well.
Moreover, it has a 3D Touch Quick launch menu such as a regular camera app with an option to go directly to macro mode.
-
Move to the specific shooting mode with 3D Touch
If you are using an iPhone 6s or 6s Plus then press hard on the iPhone camera app from your home screen and now you will get the option to move straight to the slo-mo. Selfie, or regular photo mode.
FAQs
How can we improve iPhone camera quality?
Here are some tips which can help you to take some quality images with your iPhone.
- For a sharp iPhone, photos keep your iPhone steady. Because by moving your iPhone camera you will not be able to take a clear picture instead you will only take blur pictures due to camera shake.
- You must set a focus point.
- Make sure to avoid Grain.
- In post-processing sharpen your photos.
- Take care of the light.
- Expose the shot accurately.
What are the best settings for an iPhone camera?
Here are some settings of the iPhone cameras for every photographer to take some quality photos.
- To take, Sharp photos set the focus.
- For low-light photos, you should use the night mode.
- To zoom in and out, switch between iPhone lenses.
- You can blur the background of your photos by using the blur mode of the iPhone camera.
How we can make the iPhone camera look professional?
Most of the photography apps of the iPhone contain a slew of filters.
Make sure not to overuse these filters because they can make your pictures look unrealistic.
It will be better to use Shadows, Silhouettes, and Reflections. Such techniques add quality and drama to a particular photo.
How to make iPhone 12 photos look more professional?
The iPhone 12 Pro and Pro Max are able to use the three cameras to capture outside the current frame.
You have to position your iPhone in landscape or portrait mode.
Then you have to zoom in past the 0.7x mark.
The screen of your iPhone shows the area outside the framing of your shot.
Why my iPhone photos have Low resolution?
If there is not enough space available on your iPhone and the setting of iCloud photos is turned on then your full-resolution videos or photos will be replaced with low-resolution photos or videos.
Your cloud storage contains your full-resolution photos.
You can also turn off this setting by going to the settings of your iPhone then go to the photos section and then you have to turn off this picture.
Ending Lines
Definitely, there are a lot of third-party apps available out there which can help you to add some extra features and functionality to make your iPhone camera better.
There is an amazing app with the name FiLMiC Pro that is an amazing video-oriented app and as compared to the stock camera app it can do much more.
For simple photography, you can try apps such as ProCam 3 which offers some great features to both video shooters and still photographers.