
Here we are gonna learn how to create a fillable form in Word?
Each time we talk about creating fillable forms we always thought about the PDF documents and Adobe.
This task can also be done with the help of MS Word.
Whenever we need fillable forms, we frequently choose the option of advanced PDF editors that contain helpful tools.
But still, so many people don’t know that we can also create fillable forms in Word.
From here you will come to know the process of how to create a fillable form in Word.
There are two main methods to do this in Word.
One of these methods is to use text boxes throughout and then creating custom fields.
On other hand, the second method is to utilize developer tools and the various data entry controls that are also available.
How to Create a Fillable form in Word for windows/mac
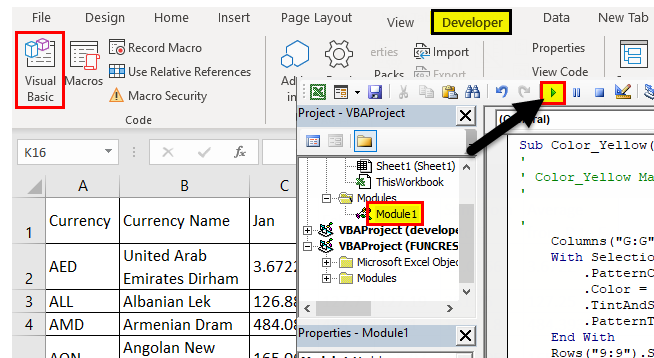
Turn on the Developer Tab
- When you create form elements in a document, you will require to switch on the Developer tab on the Ribbon.
- For this purpose, first, you have to click the file.
- Then you will be redirected to options to access the Word Options dialog box.
- Choose Customize Ribbon.
- After that select the check box for the Developer tab.
- Then, the Developer tab will arise on the Ribbon.
Add Content Controls
Now you are prepared to add the various parts of the form.
To add a content control field, allocate the cursor in the desired location, then select a field from that Controls group on the Developer tab.
You can hover your mouse over the fields to see the various options. In this illustration, we are adding a text field so users can type their first names.
- The content control field will come out from the document.
- In this scenario, you can add various types of fields. For instance, you can add checkboxes for a yes or no question.
- When you have added all of your fields to the document, you are prepared to send out the form for other users.
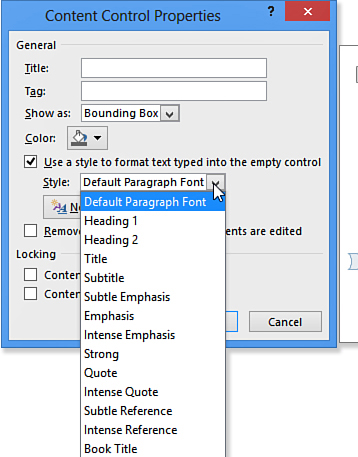
Customize As Required
If you are thinking about even more control over the way your form looks, you will need to turn on Design Mode from the Controls group on the Developer tab.
- Open the Word document that you prefer to make into a PDF form.
- Go to the File option and then Print, be confident that “Adobe PDF” is selected as your printer, and then select the Print button.
- Word will inquire you about where to save the PDF file you are creating. Click desktop or Fileshare and select OK.
- Your computer system will establish a PDF file, which will then open automatically in the Adobe Acrobat PDF editing program.
- At this step, you have a fundamental PDF document, but you need to tell Acrobat to make it a fillable form. To proceed, select the Tools button, then the Forms button, and then Create.
- Acrobat will ask about some of the issues from you. On the first screen, be confident “Use an existing file” is selected, then click Next.
- On the next step, make sure “Use the current document” is selected, then select Next.
- Acrobat will try to identify all the fillable fields in your form. It is not that accurate. You will have to edit some of the options manually since Acrobat usually sets decorative lines poorly as fillable fields.
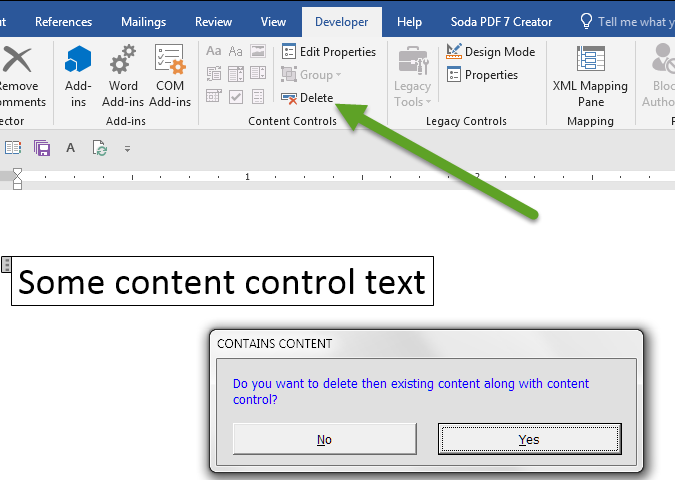
- If you find a form field you need to remove, click on it and click the Delete button on your keyboard. You are not deleting the line, simply the field that Acrobat established incorrectly.
- When you see the form is prepared, press the Preview button to glimpse how it seems to the one who is filling it out.
- In any case, if you need to make more modifications, click “Edit” to return to the form editor. Otherwise, go to the file and then save as and save your complete form.
Content Controls of Form
You can also add different types of form controls in your form.
By using these people can add their responses.
- Check Box: You can insert a checkbox to your form.
- Drop Down List: Users can select multiple options from the drop-down list. The drop-down list will appear by clicking the arrow.
- Legacy Tools: From legacy tools, you can get form controls of the earlier MS word version.
- Data Picker: When a user will select the date this control will format the date automatically.
- Combo Box: This form controls the list for users to edit directly.
- Building Blocks Gallery: It displays a formatted design gallery from a gallery of quick parts.
- Rich Text: A field for text input. This allows rich text formatting to a user.
- Plain Text: You can insert a plain text field which means that nobody can add formatting.
Finalizing the Form
Before you distribute this form to different people to fill-up the form, you have to restrict or make it uneditable so that the structure and controls of your form could not be removed.
- From the developer, tab click on the restrict editing button.
- On the right side, there will be a restricted editing pane.
- Now you have to check the editing restrictions check box.
- Then click on the list arrow of editing restrictions.
- Choose the filling in forms option.
- After you enable this option then people can only fill your form. Except that they will not be able to make any changes in your form controls or structure.
- They will not be able to delete, edit or move any fields on their own until protection is turned off.
- Enforce protection by clicking the yes button.
- You don’t need a password to enforce protection. But you can use a password to make sure that nobody turns off this protection.
- Then click Ok after entering your password.
Ending Lines
In the following articles, we have explained how to create a fillable form in word.
We have described the complete method to you.
So, if you want to make a fillable form due to any reason you can follow this step-by-step process.